Keeping your dotnet versions lean and clean
If you are like me and wants to have the a lean list of `dotnet` version in your system. You may want to make sure only to keep the version you frequently use. In this post we are going to talk about how to add and remove `dotnet` versions you need and dont need. Lets start!
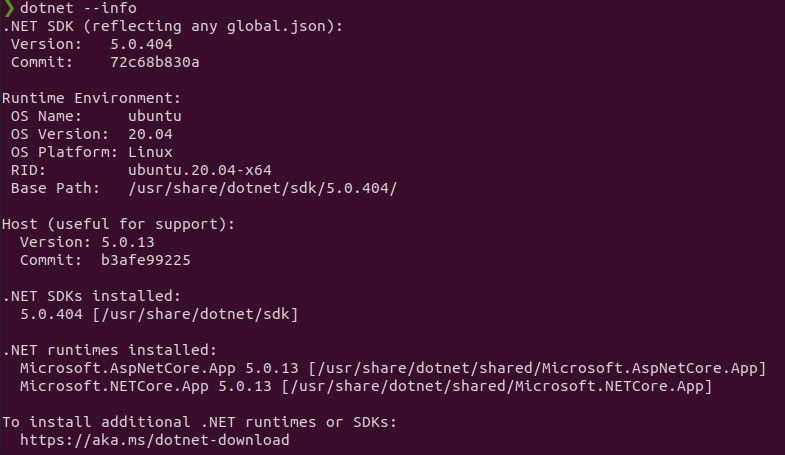
First lets check the version of dotnet via command line. Type this command:
dotnet --infodotnet --infoYou should see something like this:
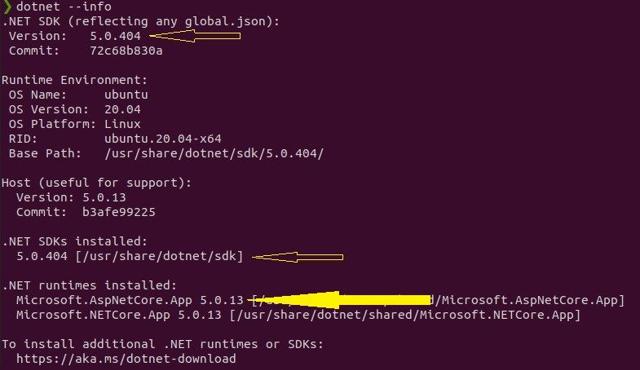
Notice the first arrow is saying 5.0.404 this is the version reflected in global.json of dotnet.
The second arrow shows the version of SDK currently installed and available
The third arrow shows the available run time installed.
Now that we know the version, you can run the following command to remove the versions you dont need/want.
To Remove the sdk, specify the version(in my case 5.0.404):
sudo apt remove --purge dotnet-sdk-5.0.404sudo apt remove --purge dotnet-sdk-5.0.404After that it will suggest to remove unused dependencies. Run the following command:
sudo apt autoremovesudo apt autoremoveNext we remove the runtime version we dont want with the following command(in my case 5.0.13):
sudo apt remove --purge dotnet-runtime-5.0.13sudo apt remove --purge dotnet-runtime-5.0.13It will again suggest to remove unused dependencies. Run the following command:
sudo apt autoremovesudo apt autoremoveThats it! You have remove dotnet versions you dont want or need!
Disclaimer: All content reflects my personal views only and does not represent the positions, strategies, or opinions of any entity I am or have been associated with.